Start with the failure evidence, not the replacement part
A failed turbocharger should be treated as evidence before it is treated as a shopping list. The visible damage can tell the buyer whether the next order should be a repair kit, CHRA, Turbine Wheels, compressor wheel, actuator, bearing housing or complete turbocharger. If the failed unit is discarded before inspection, the same external cause can damage the replacement unit and turn a parts order into a warranty dispute.
Begin by recording the customer complaint, operating condition and first visible symptom. Loss of power, smoke, noise, oil consumption, boost fault codes and wheel contact each point to different inspection paths. A bench inspection should confirm what failed, but it should also ask why the failure happened.
Bearing wear and shaft play
Radial and axial shaft movement are useful clues, but they must be read with care. Some radial movement is normal on a floating-bearing turbo when it is dry on the bench because the rotor normally runs on an oil film. The warning signs are wheel contact, heavy scoring, heat marks, excessive axial movement, damaged thrust parts or a shaft that does not rotate smoothly.
If bearing wear is present, inspect the oil supply system before assuming the turbo alone caused the failure. Contaminated oil can score bearings and journals. Oil starvation can create heat discoloration, seized bearings and heavy thrust wear. Excessive oil temperature or long service intervals can leave carbon deposits that restrict flow. In those cases, a replacement CHRA or repair kit will only survive if the oil cause is corrected.
Compressor and turbine wheel contact
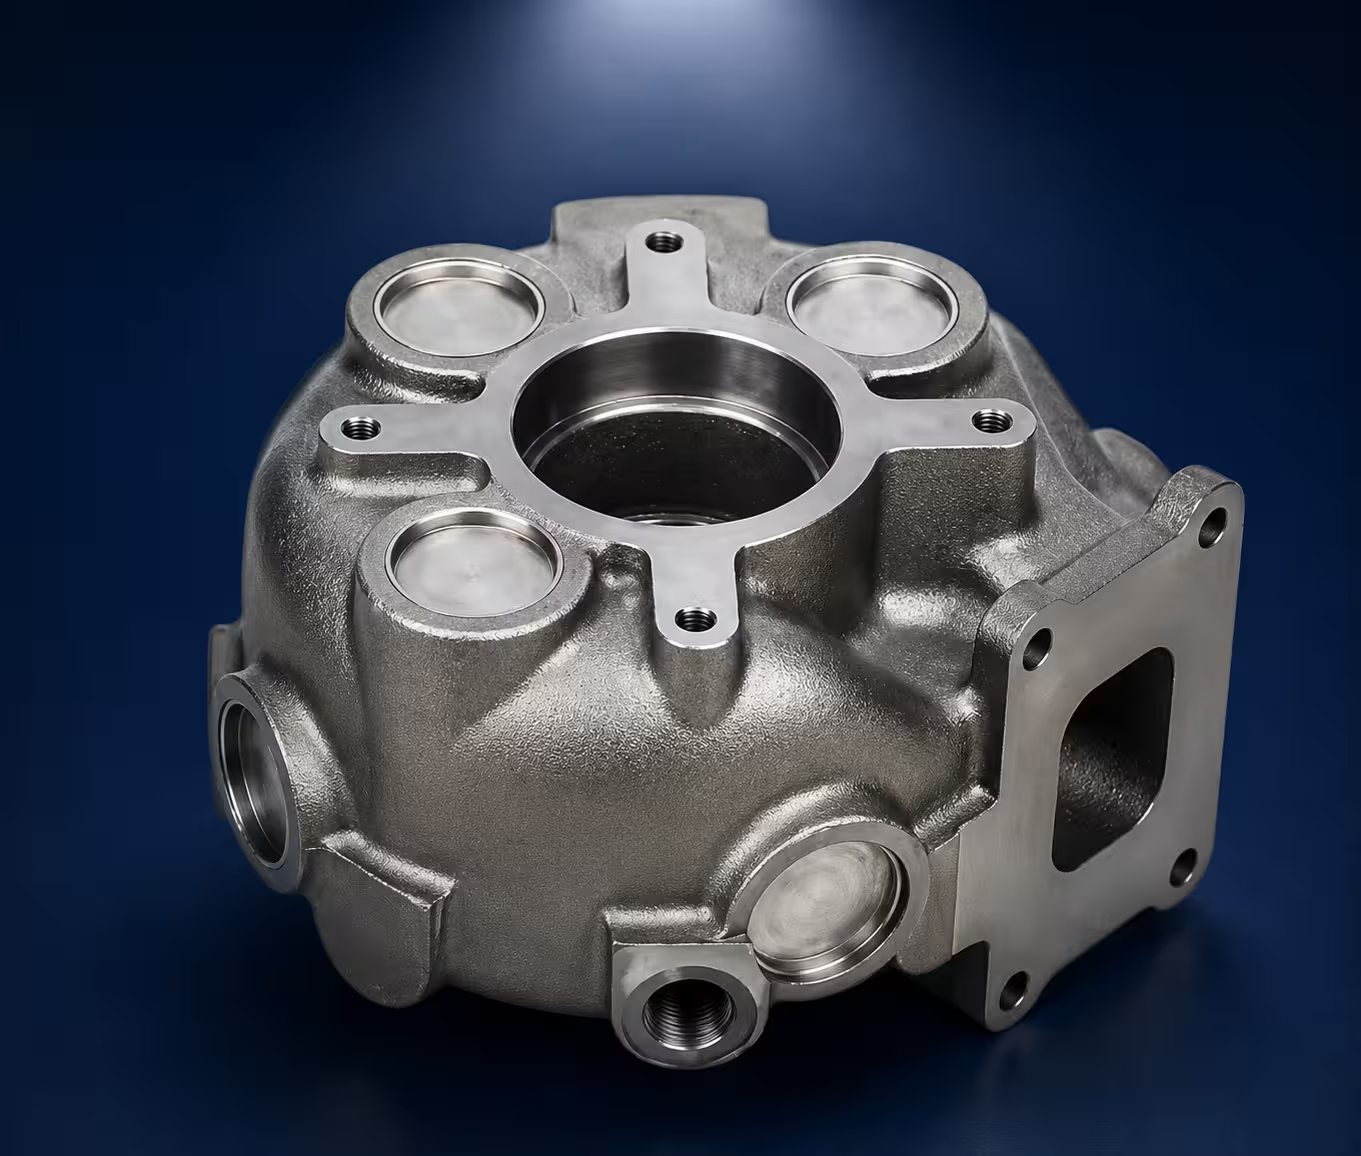
Wheel contact is one of the clearest signs that the rotating group lost control. Compressor wheel rub marks on the cover may come from bearing wear, bent shaft, foreign object damage or overspeed. Turbine wheel contact can indicate heat distortion, bearing collapse, housing damage or debris on the hot side. The direction and depth of the mark matter because light witness marks are different from heavy blade-to-housing contact.
When wheel contact is found, compare the cover and housing before choosing the replacement scope. A CHRA may be enough if both housings are still dimensionally clean. If the compressor cover bore is damaged, turbine housing is distorted or the actuator/VNT area is contaminated, a complete turbocharger may be the more reliable commercial path.
Foreign object and overspeed clues
Foreign object damage usually leaves localized blade impact, chipped leading edges or uneven blade loss. Compressor-side FOD can come from loose intake hardware, filter failure, hose fragments or previous engine work. Turbine-side debris can come from engine damage, exhaust manifold fragments or broken upstream components. Replacing only the wheel without correcting the debris source creates repeat risk.
Overspeed damage often appears as stretched, burst or heavily rubbed compressor wheel damage, sometimes with heat and bearing distress. It may be caused by boost control faults, actuator problems, air leaks, incorrect calibration or restricted exhaust conditions. For B2B buyers, overspeed evidence should trigger an actuator and control-system question before the replacement type is finalized.
Oil, carbon and heat patterns
Oil in the housings is not a failure mode by itself; it is a symptom that must be tied to a cause. Drain restriction, crankcase pressure and external oil-line leakage should be checked before blaming seals. Carbon buildup around the turbine side, bearing housing or VNT area can indicate heat, oil quality or operating pattern issues. Heavy carbon can also make nozzle mechanisms stick and create boost control symptoms.
Heat discoloration on the shaft, bearing parts or turbine-end hardware should be documented. It can point to oil starvation, shutdown heat soak, restricted oil flow or excessive exhaust temperature. The diagnosis should separate damage that the new turbo will fix from conditions the installer must correct.
Decision path after diagnosis
A minor sealing issue with clean bearings may point toward a repair kit. Bearing wear with reusable housings may point toward a CHRA. Broken or damaged Turbine Wheels, compressor wheel contact, cracked housings, failed actuator or uncertain VNT condition may move the decision toward a complete turbocharger. The correct purchasing decision depends on what can be reused with confidence.
For distributors and rebuilders, keep the failure diagnosis with the quote record. Photos of the compressor inlet, compressor cover, turbine outlet, oil ports, shaft end and damaged parts help the supplier recommend the correct path and reduce disputes when the same failure appears again.
Failure diagnosis checklist
Photograph the turbo tag, compressor side, turbine side, actuator and oil connections before disassembly.
Check shaft rotation, radial movement, axial movement and visible wheel contact.
Inspect compressor and turbine blades for impact, rubbing, erosion, burst marks or missing material.
Look for oil restriction, carbon deposits, heat discoloration and contaminated bearing parts.
Decide whether the order should be repair kit, CHRA, wheel, housing, actuator or complete turbocharger.
Common Questions
Can a failed turbo be diagnosed without disassembly?
Some clues are visible from photos and shaft feel, but bearing damage, thrust wear and carbon restriction often need closer inspection.
Should I replace the turbo before finding the root cause?
No. If oil supply, debris, actuator or installation problems remain, the replacement turbo can fail again.